
How to assemble a drum set in an easy ergonomic way
Easy way to set up a drum kit - step-by-step
We get asked a lot of questions about setting up a drum kit in an ergonomic way. We thought it would be helpful to share the top tips here.
Your own set up will depend on what sizes and depths of drums you have, what type of hardware you use and other factors dictated by the kit itself. It will also be affected by your own physical dimensions (leg length etc). However, what we show here in this guide are general principles which can help you in setting up a drum kit to be positioned as optimally as possible.
This guide is an easy way to get everything set up in a way that will adapt to your own situation. It is all to do with the order in which you put the drum kit together.
Video - overview (5 mins)
Here is a good place to start. This video shows the whole process in 5 minutes (read on below for greater detail about each step). Save the video to your favourites to come back and find it again if you need a quick reminder in future.
There is no talking on the video so you can watch it with or without sound.
Step-by-step (with pictures)
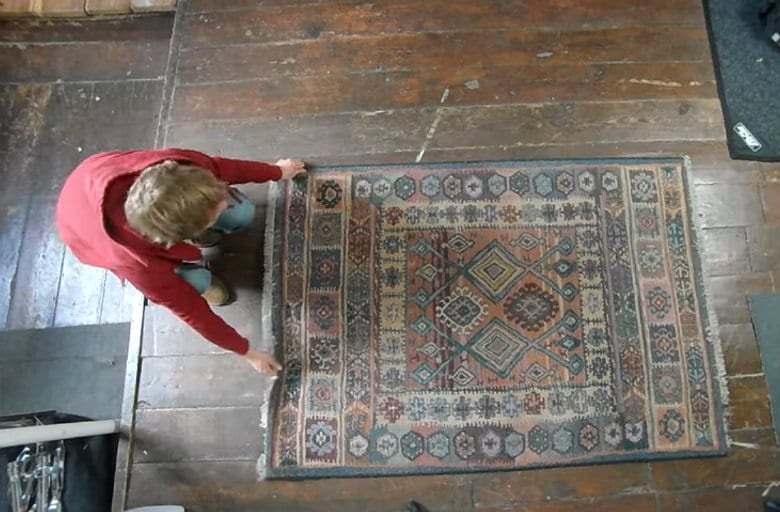
1. Position the drum mat
To make sure that the drums don't move you should set up your kit on a mat. Place the drum mat in position on the floor.
2. Set up the drum stool
Open the legs of the stool to create a solid base. Adjust the height so that when you sit on it your thighs are angled slightly downward.
Your stool can be positioned slightly off the edge of the mat to maximise space for the drums. It is a good idea to try to put one or two of the stool's legs on the mat, to help anchor the mat under your body weight and prevent slipping.

3. Sit on the stool and position your feet
Sit so that your knees are shoulder-width apart or even slightly wider. Your feet will be slightly in front of the knees and in line with the thighs. This is so you provide space for the snare drum. It will be fine-tuned later on. Don't worry about being too exact for now. The idea is to get everything positioned based on your body.
Note the positions of your feet on the floor. This where you will need to position the foot pedals.
As a general point, it is best to sit towards the front edge of the stool so your legs can move freely. Maintain good posture by keeping your back straight.
Drum kit maintenance and tuning workshops

These workshop sessions take place in central London. All welcome.
We cover everything from maintaining and fixing your drums and hardware, through to looking after cymbals, ways to tune drums, and replacing hard-to-find components or accessories. The sessions are a great way to meet other drummers and even have a bit of a 'geek-out' about drum equipment.
There is often the opportunity to swap or share or sell gear as well.

4. Kick pedal and kick drum
Place the kick pedal on the ground in the position you noted in the previous step.
Use this position to dictate where the bass drum needs to go. Make sure that the kick drum's two legs point to the front. Adjust the legs so that there is a small gap at the front from the ground to the hoop.
Attach the kick pedal, making sure the base of the kick pedal remains flush to the floor.
Secure the pedal to the kick drum by tightening the clamp.

5. Set up the hi-hat stand
Assembling the hi-hat stand can be a bit tricky, especially the first time around if it's brand new in its box.
In the video we cheated slightly by having the hi-hat stand already mostly assembled so only the legs needed to be unfolded. If your hi-hat stand is in parts, then follow these simple steps to set it up.
First set up the bottom part so that the legs and the base of the pedal rest firmly on the floor. Next, screw the thin metal rod into the threaded section on the inside of the lower tube. Then slide the upper tube over it and tighten it up.

6. Set up the snare drum
Open the snare stand's legs and position it between the foot pedals. Place the snare drum on the basket of the snare stand. Don't over-tighten this as it could choke the sound of the drum. Make sure that the claws of the basket don't block the strainer.
Sit on the stool to find the right distance and position. Let your elbows hang loosely by the sides of your upper body so the snare should be within easy reach. Adjust the height of the stand and change the tilt angle if necessary.
7. Add the hi-hat cymbals
Put the hi-hat cymbals on the hi-hat stand. The bottom cymbal sits on the large felt on the stand. The top cymbal is fixed with the hi-hat clutch.
7.i.
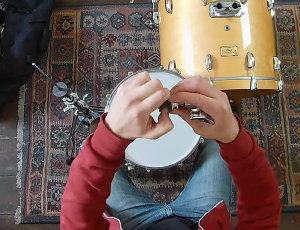
Undo the hi-hat clutch and separate the felts.
7.ii.

Place the bottom hi-hat cymbal on the stand.
7.iii.
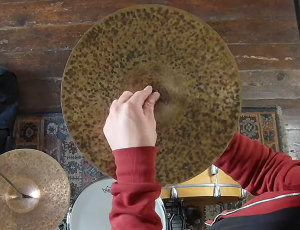
Secure the top cymbal between the felts and tighten the clutch.

8. Mount the toms
Place the tom mounts into their holders. One by one, add each tom to the kit. Leave enough space to put the next drum in position.
The angle of each tom should be reasonably shallow but slightly tilted towards you. Some people prefer a more severe angle, but with some mounting systems and depths of drums this will cause the mounted toms to make contact with the kick drum. Avoid the rims of the drums touching anything else or you will find it creates annoying rattles, buzzes or other unexpected noises. It could also cause damage if they touch or rest on each other so make sure there is at least some clearance even if you set them close together.

9. Set up the cymbal stands
If you are setting up a ride and a crash, then one boom stand and one straight stand should do the job nicely.
10. Add the ride and crash cymbals
To ensure that your cymbals last a long time your cymbal stands should have two felt pads and a protective sleeve on the threads.
Don't over-tighten the cymbals so they can vibrate freely. Make your adjustments the height of the cymbals on the stands so they are a comfortable distance to strike without over-reaching.
Checklist
- Lay the drum mat, sit on your stool, and position your feet.
- Based on your feet positions, place the kick drum, hi hat and snare drum.
- Mount the toms approximately then adjust the angles and heights.
- Add the other stands and cymbals and set the height and position.
- Refine the playing position to check everything is in a comfortable place.
The basic principle is to go from the ground and work upwards. Return to sit on the stool regularly as you go through the setup process. This will help you check you are setting things relative to your own body.
Wrapping up
If you have any questions, please don't hesitate to get in touch via the contact page, or leave a comment below. We hope this has been a useful starting point for setting up your drum kit in an ergonomic way.
Come along to a future group workshop or take some one-to-one drum kit lessons with Elephant Drums. Find out more by checking out the options for Drum Tuition.
Right on! Excellent tutoring