
Introduction
We've received a few comments on the blog and other questions by email about setting up electronic drum kits. The aim of this article to answer those common questions and to help anyone else looking for information about setting up an electric drum kit.
If you're coming to this page you are probably looking for one of these two things:
- Help and advice on setting up the electronic pads and the physical layout of the kit
- Information and guidance about the features and settings within the electronic 'brain' of the drum set
This article deals with how to physically set up your e-drums in an efficient and comfortable way.
If you're looking for information about buying an electronic drum kit, please see Electronic drums – a guide to buying an e-kit
First things first
Here at Elephant Drums we don't sell drum kits, we only provide drum lessons. So this article does not contain links or information about specific brands / models of drum kits. This guide is about the general principles that apply to the majority of electronic drums which learners are likely to have at home. This page won't cover the detailed settings of each and every different type of drum kit in the world, so if you have a question not covered on this page, we'll do our best to answer it in the comments.
If you have an acoustic drum kit, or if you are looking for the most comfortable way to position your drums, you might want to check out our other previously published guide to setting up a drum kit ergonomically.

Quick start guide:
To set up an electronic drum kit, follow these steps:
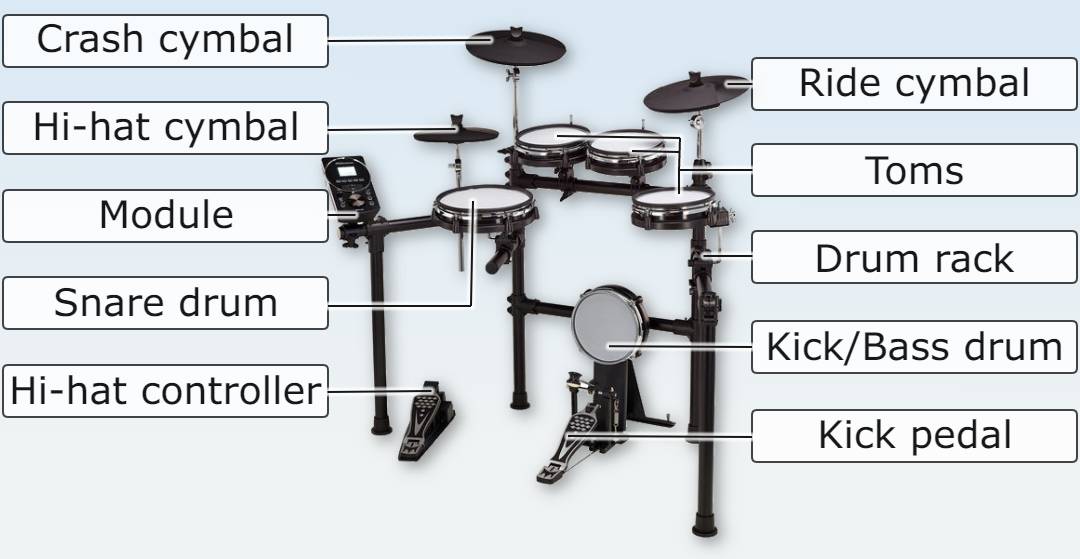
1. Assemble the drum pads and pedals according to the manufacturer's instructions. This will typically involve attaching the pads to the drum rack or stands, and connecting the pedals.
2. Connect the drum module to the drum pads and pedals using the appropriate cables. The drum module is the brain of the electronic drum kit and is responsible for generating the drum sounds.
3. If you are using headphones, plug them into the drum module. If you are using an external amplifier, connect it to the drum module using a suitable cable. You may require an adapter for the standard audio jack to a mini-jack or vice versa, depending on your equipment.
4. Turn the power on the drum module and follow the on-screen instructions to explore the kit's sounds and features. There should be a clear and intuitive way to try out the range of different drum kit sounds. Just play with these sounds at first before getting into any more advanced editing capabilities your drum kit might be able to do.
5. Adjust the drum pads and pedals to your desired playing position. This may involve adjusting the height and angle of the pads, and the distance of the pedals. Make sure your drum stool is positioned at a comfortable distance and height.
6. Experiment with different drum sounds and settings. If you need to, you can always perform a "factory reset" to configure the drum kit and its settings to the presets that it originally had.

Why won't wireless headphones work?
Some of the more modern drum kits might come with the option to use Bluetooth headphones. However, the issue here is there is often a small delay (also known as latency) between the time you strike the drum pad and when you hear the sound through your headphones.
Latency becomes noticeable when it exceeds 12 milliseconds (ms). The latency that most Bluetooth devices introduce is at least 32ms in the very best circumstances, but can be anywhere up to 300ms.
The short answer is, to avoid disappointment, stick with wired headphones!

Standard setup for an e-drum kit
Video - overview (5 mins)
This video is a quick 5-minute run-through of the steps involved in setting up a drum kit. This is actually for an acoustic drum kit, but the principles for assembling an electronic drum kit are much the same. You can use this video as a starting point for the general principles of assembling an e-drum kit as well.
There is no talking on the video so you can watch it with or without sound.
The main point of the video is start with the drum stool and position your feet pedals first. Then build the rest of the drum kit around those positions to make it as ergonomic for your body as possible.
Step-by-step (with pictures)
1. Position the drum mat
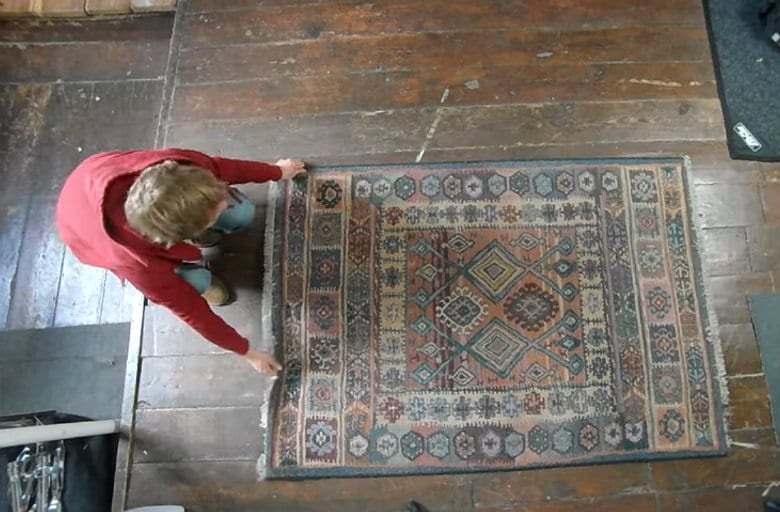
To make sure that the drums don't move you should set up your kit on a mat. Place the drum mat in position on the floor.
2. Set up the drum stool
Open the legs of the stool to create a solid base. Adjust the height so that when you sit on it your thighs are angled slightly downward.
Your stool can be positioned slightly off the edge of the mat to maximise space for the drums. It is a good idea to try to put one or two of the stool's legs on the mat, to help anchor the mat under your body weight and prevent slipping.

3. Sit on the stool and position your feet
Sit so that your knees are shoulder-width apart or even slightly wider. Your feet will be slightly in front of the knees and in line with the thighs. This is so you provide space for the snare drum. It will be fine-tuned later on. Don't worry about being too exact for now. The idea is to get everything positioned based on your body.
Note the positions of your feet on the floor. This where you will need to position the foot pedals.
As a general point, it is best to sit towards the front edge of the stool so your legs can move freely. Maintain good posture by keeping your back straight.

4. Kick pedal and kick pad
Place the kick pedal on the ground in the position you noted in the previous step.
Use this position to dictate where the drum pad needs to go. Some kick drum pads are an all-in-one type where the pedal and the pad are an integrated unit.
If yours is a separate kick pad or mesh head, attach the kick pedal making sure the base of the kick pedal remains flush to the floor.
Secure the pedal to the pad unit by tightening the clamp.
Types of kick pad
Tower Pad

Mesh Pad

Integrated Kick Pedal/Pad

5. Set up the hi-hat stand (if available)
Only some electronic drum kits will have a separate hi-hat stand. If your e-kit comes with an integrated hi-hat pedal or rack-mounted cymbal pad, then skip this step.
In the video we cheated slightly by having the hi-hat stand already mostly assembled so only the legs needed to be unfolded. If your hi-hat stand is in parts, then follow these simple steps to set it up.
First set up the bottom part so that the legs and the base of the pedal rest firmly on the floor. Next, screw the thin metal rod into the threaded section on the inside of the lower tube. Then slide the upper tube over it and tighten it up.

6. Set up the snare stand and pad
If your kits comes with a separate snare stand, open the legs and position it between the foot pedals. Place the snare pad on the basket of the snare stand. Otherwise, attach your snare pad to the drum rack.
Sit on the stool to find the right distance and position. Let your elbows hang loosely by the sides of your upper body so the snare should be within easy reach. Adjust the height of the stand and change the tilt angle if necessary.
7. Add the remaining drum pads
Put the hi-hat cymbals on the hi-hat stand (if using a stand). The other pads go in their respective locations on the rack or on their stands (depending on what type of e-kit you've got).
Drumming workshops

These workshop sessions take place in central London. All welcome.
We cover everything from maintaining and fixing your drums and hardware, through to looking after cymbals, ways to tune drums, and replacing hard-to-find components or accessories. The sessions are a great way to meet other drummers and even have a bit of a 'geek-out' about drum equipment.
There is often the opportunity to swap or share or sell gear as well.
Checklist
- Lay the drum mat, sit on your stool, and position your feet.
- Based on your feet positions, place the kick drum, hi hat and snare drum.
- Mount the toms approximately then adjust the angles and heights.
- Add the other stands and cymbals and set the height and position.
- Refine the playing position to check everything is in a comfortable place.
The basic principle is to go from the ground and work upwards. Return to sit on the stool regularly as you go through the setup process. This will help you check you are setting things relative to your own body.
Wrapping up
If you have any questions, please don't hesitate to get in touch via the contact page, or leave a comment below. We hope this has been a useful starting point for setting up your drum kit in an ergonomic way.
Come along to a future group workshop or take some one-to-one drum kit lessons with Elephant Drums. Find out more by checking out the options for Drum Tuition.